You want to create a simple book promo video to upload to YouTube, but you don’t know where to start. Let me help you!
Fancy making a simple YouTube Short book promo video that looks something like this?
Here we go!
Firstly, I’m assuming you have a Canva account. If you don’t, go and create one, then report back for duty.
Secondly, I’m assuming some basic Canva knowledge, although I explain most steps along the way. If any steps don’t make sense, it’s probably me, not you, so don’t be afraid to ask in the comments!
Sorted? Let’s dive in!
Set up the blank video canvas
- Open Canva.
- Click ‘Create a design’.
- Under ‘Create new’, select ‘YouTube Shorts’.
- A new blank project will open, which is automatically the right dimensions.
Start to build your book promo video
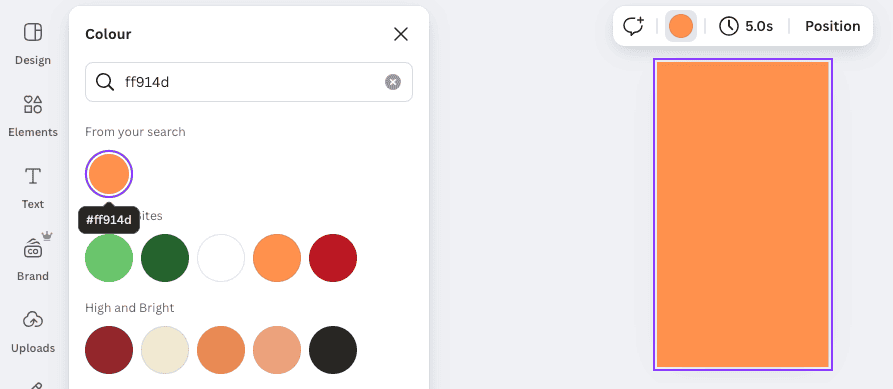
For my Short, I chose a striking plain orange background that matches the colour theme of my Tricky Quickies 1 cover:
- Click on the white canvas so it is selected (with a purple outline).
- Click on the colourful circle above the canvas to select the background colour.
- If you know the RGB value of your colour, enter it into the search box. Otherwise, find a colour you like either from the Default colours, or click on the colourful circle with a cross in the middle and discover the best colour for your design.
- Click on your preferred colour and it will be applied to the background of your design.
- If you change your mind, just select a different colour using the steps above and it will automatically replace the previous one.
Add animated text to the first page
Canva calls each stage of your video a ‘page’.
- Select ‘Text’ from the far left grey panel.
- Click on ‘Add a text box’.
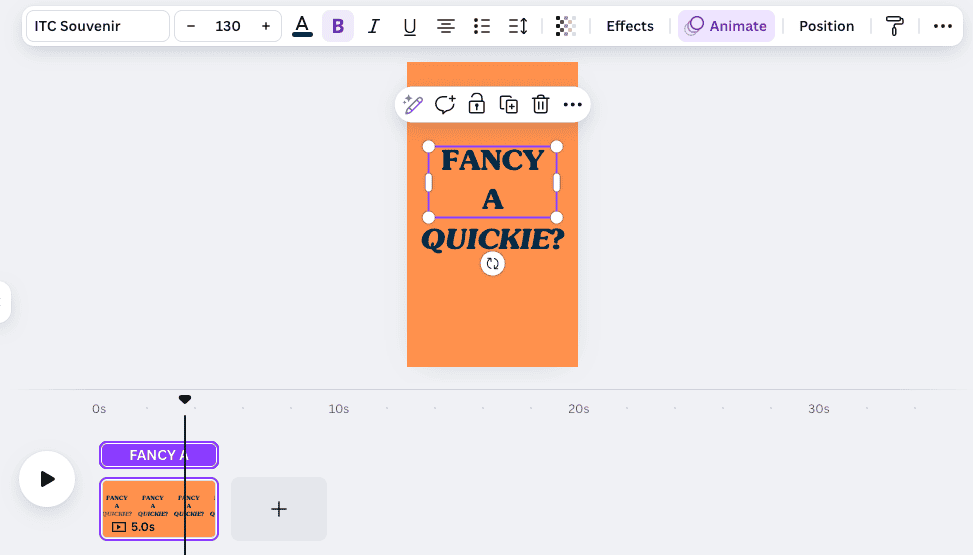
- Click on the text box to ensure it’s selected (purple outline with white circles at the corners).
- Adjust the size, font and colour of the text.
- Select ‘Animate’ from the top menu.
- Pick your animation. As your cursor hovers over each option, you can see the animation in action on your design. For the text at the start of my video, I chose the ‘Rise’ animation.
- Adjust the speed and direction of your animation. You can also pick whether you want it to occur when the page first loads, when the page ends, or both. I chose both for my particular video.
- You can alter the length of time a page will play by clicking on the page’s thumbnail and either dragging the double-headed arrow on the thumbnail or clicking the number next to the clock icon above your design and typing in how many seconds you want the page to appear.
You’ve completed the first animated page of your video!
Add a second page
Now you will create a second page for the next element of your design.
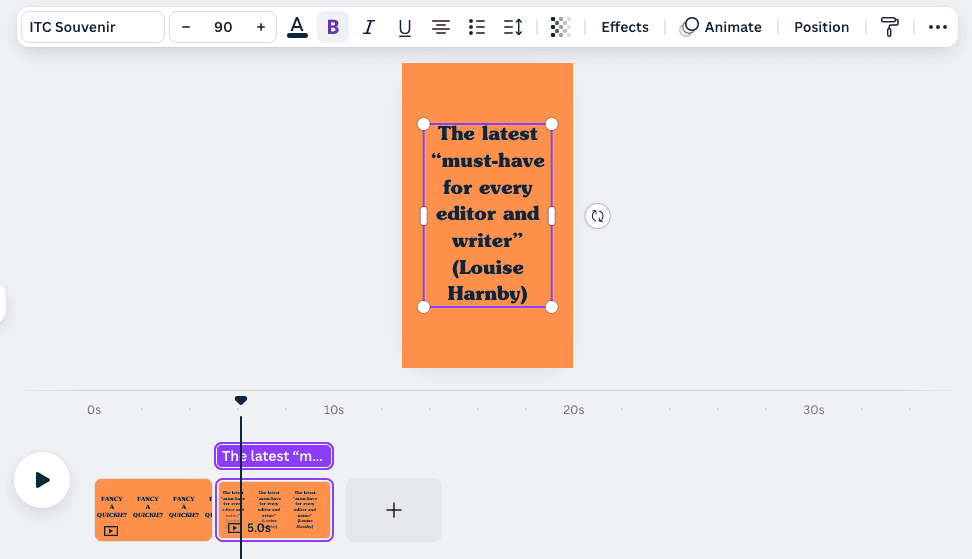
- Click on the plus (+) symbol in the grey box to the right of the thumbnail of your first page (that was a mouthful!)
- A new page will be created with the same background colour as the first one.
- Rinse and repeat for subsequent pages of animated text.
- Experiment with background colours and animations. Don’t be afraid to try unusual combos. They might just work!
- You can see how your two pages will play out in the final book promo video by clicking on the play icon to the left of the first thumbnail.
Add a transition (optional step)
Depending on which animation you’ve chosen for your text, a transition between the pages may make for a smoother viewer experience.
I didn’t do this for my book promo video as the entry and exit ‘rise’ animations act like a transition, and I didn’t want to overcomplicate the design.
If you want to add a transition, here’s how you do it:
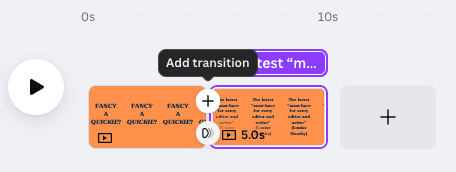
- In the panel below the main design pane, position your cursor between the thumbnails of the two pages you’ve created.
- Click on the arrow-type icon that appears.
- Select the transition you like. Just like when you chose your animation, you can hover over each transition to see a preview of how it will look.
Add your book cover image
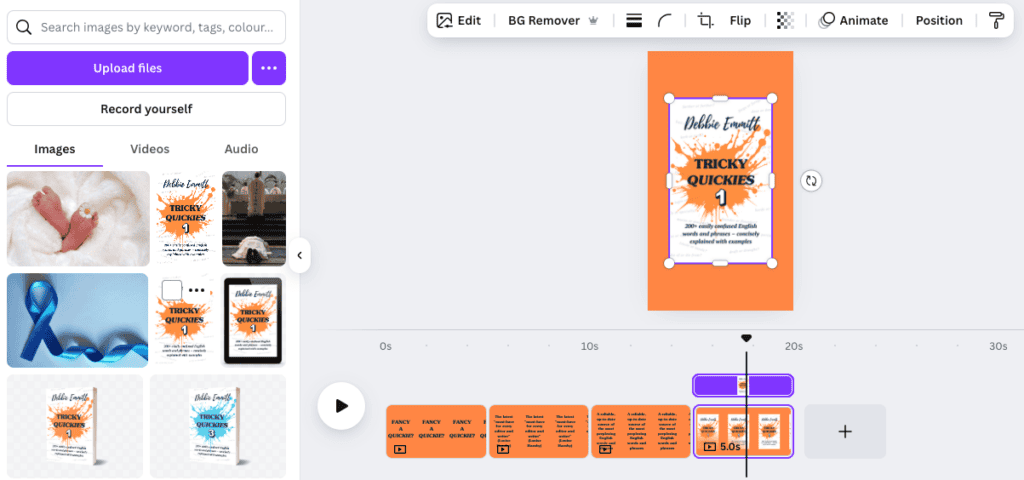
I chose to feature my book cover on the fourth page of my video, after I’d hooked people with a funny tagline and two short pages describing the book. Wherever you decide to feature your book cover, here’s how you do it:
- Create a new page, as you did before (click the ‘plus’ icon in the thumbnail pane).
- If you’ve previously uploaded your book cover to Canva, you can use the existing image file. Click on ‘Uploads’ in the far left vertical panel.
- If your book cover doesn’t yet live in Canva, click on ‘Uploads’, then ‘Upload files’, and locate the image on your computer.
- Click on your book cover in the Uploads section, and it will appear in your design.
- You can move your book cover by selecting it and moving it. You can also resize it using the ‘handles’ in the corners.
- Add an animation to your book cover by selecting it and clicking on ‘Animate’, as you did for the text on the previous pages.
I’ve added another image behind my book cover – a ‘splash’ that mirrors the one on my front cover. If you’d like to do the same, just repeat the steps above. You can put images behind or in front of each other by selecting one, clicking on ‘Position’ and clicking on ‘Backward’ or ‘Forward’, or ‘To front’ or ‘To back’. The latter two options send an image to the absolute back or front of your design. This won’t be relevant if you only have two images to shunt around.
If you want to emulate the animation I chose for my splash image behind my book cover (and which also features on the rest of the pages in my video), select ‘Breathe’ and alternate ‘In’ and ‘Out’ for each page. Play around until you get the effect you want!
Add as many pages as you want
Repeat the steps above to add pages to your video.
Since October 2024, YouTube Shorts can be up to three minutes long. Prior to this, the limit was 60 seconds (and originally it was only 15 seconds!). However, I’d recommend keeping your video short and snappy to enage viewers.
Add background music
The final step before you thoroughly check your video is to add some music.
NB. Be careful with licensing when it comes to music. As you’re promoting a product (and not making a funny cat video), there are certain restrictions around which music you can and can’t use.
The laws can be complex, but in a nutshell, as long as you’re using Canva’s Stock Music (rather than their Popular Music), you should be fine. You can read the full rules on using Canva’s Stock Music on their website.
- Either source copyright-free, royalty-free music outside Canva and upload it (as you uploaded your book cover image), or follow the steps below to use Canva music.
- Click on ‘Audio’ in the far left-hand vertical pane. You might need to scroll down to see it. If you can’t see this option, even after scrolling down, a different menu may be displaying. Click on your design and you should find the option appears.
- To check if a piece of music is Popular or Stock (you need Stock to legally use it for your book promo video), hover over a piece of music and click on the three dots to open the info pane. It will tell you there either “free for commercial use” or “only personal use allowed”.
- You can listen to a snippet of the music before you add it to your design (although it’s easy to remove even after you’ve added it) by clicking on the square thumbnail image displayed with the music.
- Click on the title/artist of the music to add it to your design. The audio file will appear below your video’s thumbnails.
- If you’d like the music to fade in or out, select the audio file below your thumbnails, then click on ‘Fade’ in the menu above your design. Select how many seconds you’d like the fade to last (i.e. when you want the fade to end or start).
Check your video
You’ve probably been checking your video along the way by clicking on the Play icon. Once it’s finished, carefully check it all the way through.
Consider contacting a professional proofreader to check your YouTube Short before you show it to the world. The cost of this would be minimal due to the small amount of text involved, and it may save you a lot of time, embarrassment and book sales!
I can do this proofread for you, so feel free to get in touch.
Download your video from Canva
When you’re happy with your video, you need to download it so you can share it with the world!
- Click on ‘Share’ in the top right-hand corner.
- Click on ‘Download’, then ‘Download’ again on the next pane.
- Your video may take a few minutes to download. Canva will tell you when the download is complete.
Share your video online
Now you have the completed video, you can upload it to YouTube and share or embed it, or directly upload it to your socials, send it to your mailing list, or whatever you want!
Over to you
Go and get creative! If you upload your video to YouTube, share the link in the comments so we can check our your amazing work.
Check out more of my videos, and if you want to know how I’ve done anything, just let me know. I’m still learning myself, so please be patient!



Leave a Reply