

Once you discover Microsoft Word styles, you’ll wonder how you ever did without them! Learn how to use Word styles in your book manuscript to save time and money.
You’ve written your manuscript in Word, and now you want to change the indentation of all the paragraphs. Or, you’d like your chapter headings to be a little bigger or in a different font.
So, you trawl through your manuscript, highlighting every heading or paragraph and painstakingly altering the font and indentation.
But you know there’s an easier way, right? Read on!
What are MS Word styles?
Styles in Word will help you keep everything consistent and allow you to easily update formatting of headers, text and ornamental elements in your book manuscript.
You can use the pre-existing Word styles or create your own, using bespoke names and formatting.
Why use MS Word styles in your manuscript?
Using MS Word styles saves you (and your editor and formatter) time. Once you’ve set up your Word styles, you can alter in seconds the size, font, indentation, padding and more of any styled element in your manuscript.
Word styles make document-wide style changes easy
Rather than finding (and potentially missing) all instances of a particular text element (e.g. a chapter heading or a quotation) and making formatting changes separately, you can simply right-click on the relevant style in the styles pane and modify it. Once you confirm the changes, Word will immediately apply them document-wide.
Word styles save your editor’s time (and your money)
Line editors and copyeditors use MS Word styles all the time. The styles can take some time to set up, depending on how many different elements are in your manuscript (e.g. full-out (not indented) and indented paragraphs, several levels of headings, quotations, boxed text and more).
If an author client has already marked up their document using styles, we editors do a little happy dance (behind closed doors, of course). Word styles aren’t obligatory prior to hiring an editor (and most authors don’t do this). However, if you’ve already applied Word styles, it will save your editor time and therefore could save you a bit of money.
Word styles simplify the typesetting or formatting stage
Once your manuscript has been line-edited and copyedited, you’ll send it to your typesetter or formatter to be turned into a document that looks like the final book.
If you or your editor hasn’t implemented Word styles (or marked up the document with style tags), their job is much harder. Instead of quickly applying changes to text elements document-wide, thanks to the Word styles, they need to pick through your book, applying styles as they go.
Which Word styles do authors need?
Please note: this is not about you making your book look like the finished product. Far from it. As long as each different element of your book (headings, full-out text (not indented), quotations etc.) has a named Word style applied to it, your work is done.
Typical styles that an author would need are:
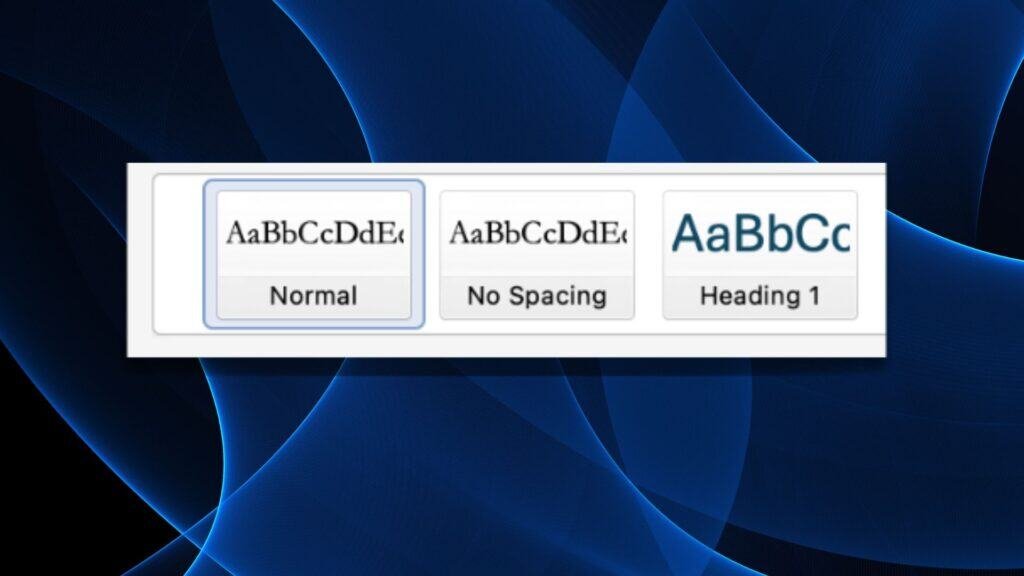
- Normal
- Full out
- Chapter heading
- Heading 1, Heading 2 (usually for non-fiction)
Other styles you may need include:
- Quotation
- Letter (e.g. if you want to have a ‘handwritten’ font in the final book)
- Text message
- Spacer or ornamental break (e.g. asterisks)
- Caption
How to create and apply MS Word styles to your manuscript
The process of creating and applying Word styles is slightly different, depending on whether you’re working on a Mac or a PC.
Word styles for Macs:
- Make sure you’re on the Home tab in Word.
- Format a piece of text, e.g. a heading, to be just as you want it (size, font, paragraph spacing. There’s no need to get too fancy – your editor will prefer a simpler font to do their work).
- Highlight the text.
- Locate the Styles button or the Styles pane, depending on how wide your screen or window is.
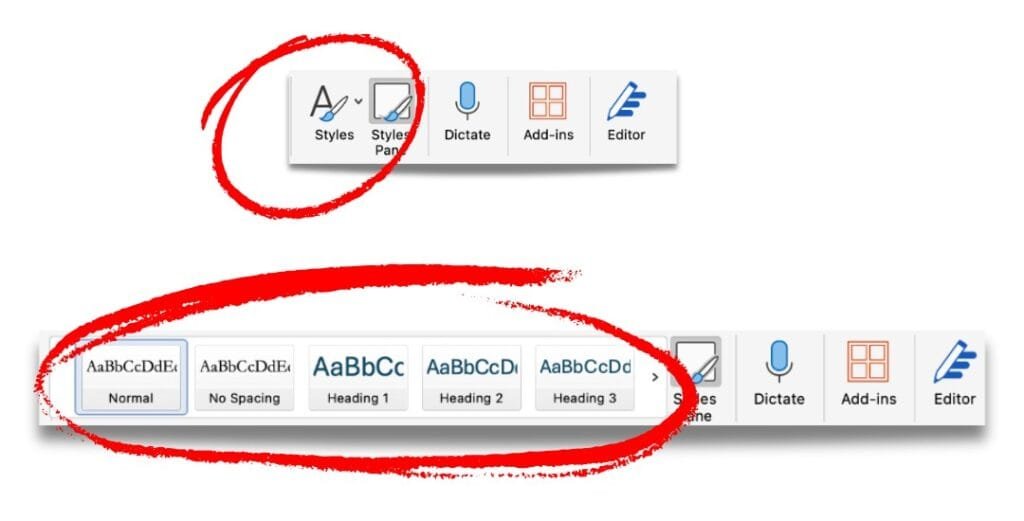
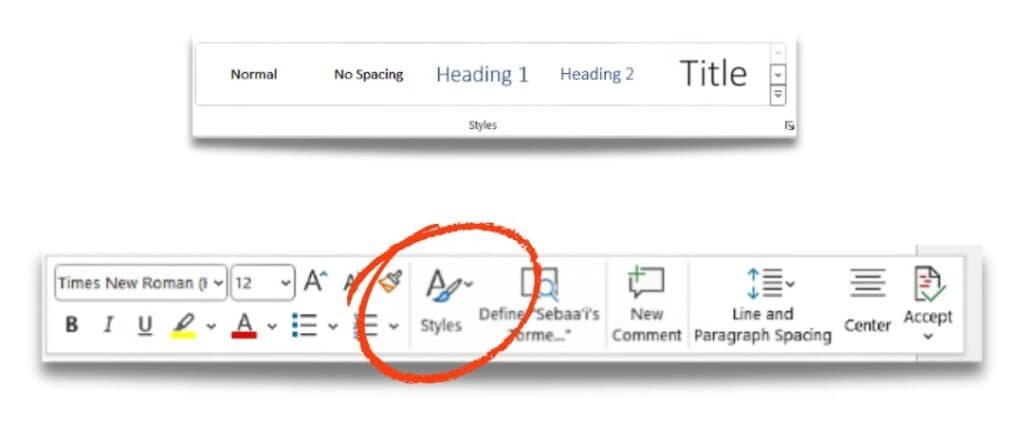
- Look through the pre-existing styles by either horizontally scrolling using the arrows or by clicking on Styles Pane.
- If a Word style already exists that makes sense for your manuscript, e.g. Heading 1, choose this style.
- If you can’t see one that suits your needs, click on Styles Pane (if you haven’t already) then New Style.
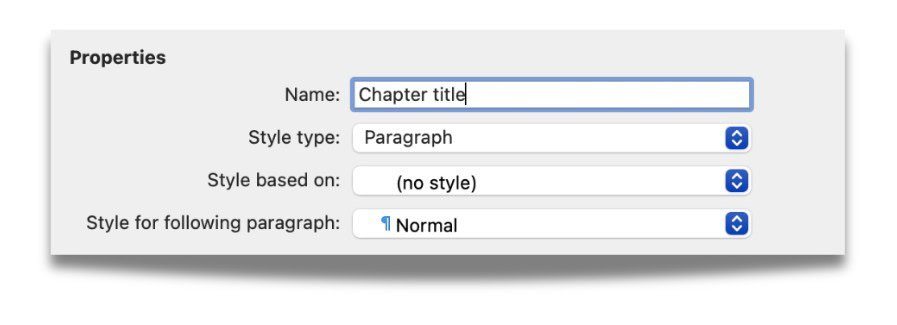
- In the ‘Name’ field, enter a short, relevant name for your style.
- The ‘Style type’ field will usually be left as Paragraph.
- The field ‘Style based on’ refers to the template style for your new style. If you choose to base it on Normal, for example, any font changes (and maybe other changes too – I’m not sure how far-ranging it is!) you make to the Normal style will be reflected in your new style. I usually select ‘None’ for this field, unless I know for sure that I’d like any changes to filter through to my new style.
- The ‘Style for following paragraph’ field refers to the style the next paragraph will default to when you hit Enter. For most cases, this will be ‘Normal’ (or whatever style you’re using for your regular manuscript text).
- When you’re happy with all the settings, select OK to apply the style to your selected text. Your new style will now appear in the Styles pane alongside the pre-existing styles.
- Next, find all similar elements in your book. For example, if you’ve just created a style for your chapter titles, work through your manuscript applying the new style to each chapter heading by highlighting or clicking on the text, then selecting the style from the styles pane.
- Whenever you make a change to that style (by right-clicking on it in the styles pane and choosing Modify), those changes will instantly be applied to all chapter headings once you select OK.
Word styles for Windows (PC)
- Highlight the text you’d like to apply a style to. Either select a pre-existing style to apply to your text via the styles section in the Home tab, or right-click to create a new style. In the Styles pane that pops up, select Styles then Create a Style.
- In the ‘Name’ field, enter a short, relevant name for your style and select Modify.
- In most cases, you’ll leave the ‘Style type’ field as Paragraph.
- The field ‘Style based on’ refers to the template style for your new style. If you choose to base it on Normal, for example, any font changes (and maybe other changes too – I’m not sure how far-ranging it is!) you make to the Normal style will be reflected in your new style. I usually select None for this field, unless I know for sure that I’d like any changes to filter through to my new style.
- The ‘Style for following paragraph’ field refers to the style the next paragraph will default to when you hit Enter. For most cases, this will be Normal (or whatever style you’re using for your regular manuscript text).
- When you’re happy with all the settings, select OK to apply the style to your selected text. Your new style will now appear in the Styles pane alongside the pre-existing styles.
- Find all similar elements in your book. For example, if you’ve just created a style for your chapter titles, work through your manuscript applying the new style to each chapter heading by highlighting or clicking on the text, then selecting the style from the styles pane.
- Whenever you make a change to that style (by right-clicking on it in the styles pane and choosing Modify), Word will instantly apply the change to all chapter headings once you select OK.
If you need more help with Word styles, the How-To Geek website has a useful post on MS Word styles, with some troubleshooting info.
If you’re tired of Word styles and want to know more about Harry Styles, here’s an article to get your teeth into.
In summary
Microsoft Word styles are fantastic beasts. Applying styles to each element of your manuscript will help you to make document-wide changes in a few seconds. They will also make your editor’s life easier, as they can get on with their line-editing and copyediting on a clean document, instead of spending time sorting out the styles.
Once you learn how to create and apply MS Word styles, you’ll wonder how you ever did without them!


How to use social proof to sell more books or attract more clients
You are more likely to sell your book or your services if people see that...